Think Before You Ink Part 2 0f 9
SPOTTING BLACKS
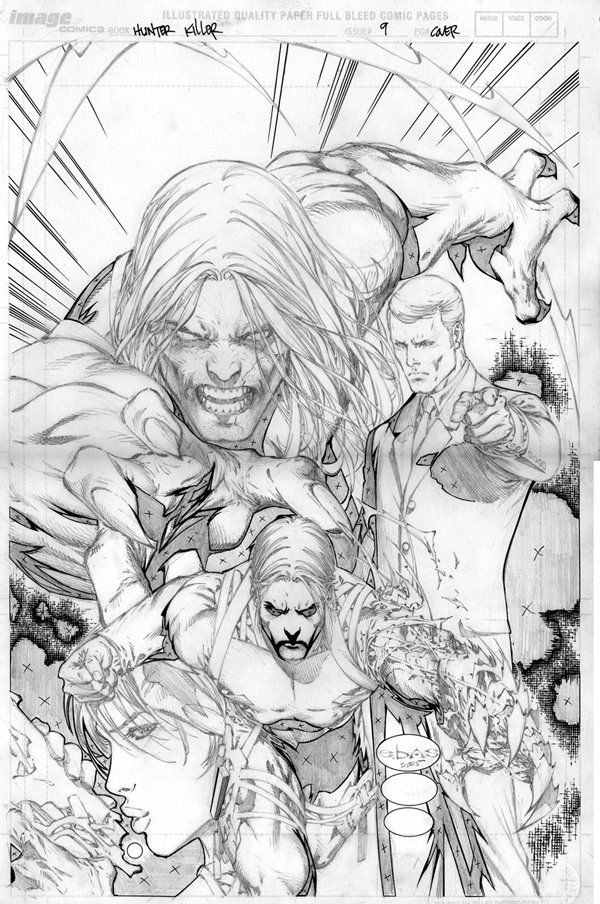
I’m going to use a Hunts #102 nib for almost all of my inking on this cover and Pelikan Type A Ink. I start off by spotting the large black areas and outlining them. I place X’s inside so I know to fill them in with solid black ink later.
TEMPLATE WORK
Next, I get all the template and ruler work out of the way. I ink the 35 degree ovals for the signatures, and the circle under her lip using templates and a Pigma Micron 01 pen. These marker type pens are perfect for use with a template since they don’t bleed ink under the lip of the plastic onto the page. Then I pick up my nib and a small triangle with beveled inking edges to ink the crosshatching (the burlap texture in the background and the speed lines above Wolf (the biggest character at the top). There’s a trick to even this simple texture, make sure the lines get fatter and close up to fade into the black areas. If you do it right, it will create a cool effect. If you don’t it will look like tiny tic tac toe grids!
posted by Aaron Sowd at 8:16 PM
![]()

0 Comments:
Post a Comment
<< Home